How To Build a GitHub Profile Using React and GitHub Profile API


The GitHub user profile Application Programming Interface(API) is a Representational State Transfer(REST) API. REST API allows communications via HTTP requests.
The GitHub user profile API gives Github users access to their GitHub profile. This access allows users to make a request and receive a response. This response could be a user's GitHub profile or repositories. Users can then display this response on a webpage.
In this tutorial, you will learn how to consume the GitHub user profile API and display your repositories and profile status on a webpage.
Prerequisite
You need to have a basic understanding of the following:
Goals
The goal at the end of this article includes:
How to consume GitHub user profile Application Programming Interface(API).
How to configure and use react-router.
Installations
Install the following tools for this tutorial:
nodejs
vs code
Set up a React Development Environment
To set up a react development environment, follow the steps below:
Open vs code.
Navigate to the built-in terminal of vs code.
Copy and paste the command below, then press enter.
npx create-react-app github-profile
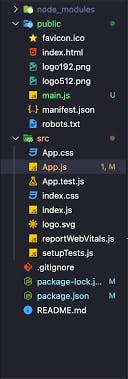
After the completion of the setup, which may take a few minutes, your development environment will set up an application structure similar to the image below.
Start your application with the command below:
npm run start
Consume GitHub API
In this section, we will create a folder to consume the GitHub user profile API. Follow the steps below to create a ConsumeAPI component:
Navigate to the src folder.
Create a subfolder. Name it component.
Create a file. Name it ConsumeAPI.js.
Copy and paste the code below into ConsumeAPI.js.
export const fetchUserRepo = async () => {
    const response = await fetch(
      `https://api.github.com/users/codeinn001`
    );
    const data = await response.json();
    return data;
};
The code above fetches a specific GitHub user profile. It then stores it in the data variable. The fechUserRepo function returns the data variable. In the code above it fetches codeinn001 user profile. You can replace codeinn001 with your preferred Github username.
The variable data will return an object like the one below.
{
    "login": "codeInn001",
    "id": 52842165,
    "node_id": "MDQ6VXNlcjUyODQyMTY1",
    "avatar_url": "https://avatars.githubusercontent.com/u/52842165?v=4",
    "gravatar_id": "",
    "url": "https://api.github.com/users/codeInn001",
    "html_url": "https://github.com/codeInn001",
    "followers_url": "https://api.github.com/users/codeInn001/followers",
    "following_url": "https://api.github.com/users/codeInn001/following{/other_user}",
    "gists_url": "https://api.github.com/users/codeInn001/gists{/gist_id}",
    "starred_url": "https://api.github.com/users/codeInn001/starred{/owner}{/repo}",
    "subscriptions_url": "https://api.github.com/users/codeInn001/subscriptions",
    "organizations_url": "https://api.github.com/users/codeInn001/orgs",
    "repos_url": "https://api.github.com/users/codeInn001/repos",
    "events_url": "https://api.github.com/users/codeInn001/events{/privacy}",
    "received_events_url": "https://api.github.com/users/codeInn001/received_events",
    "type": "User",
    "site_admin": false,
    "name": null,
    "company": null,
    "blog": "",
    "location": null,
    "email": null,
    "hireable": null,
    "bio": "Front End Engineer||Technical Writer",
    "twitter_username": "alegeboss",
    "public_repos": 52,
    "public_gists": 1,
    "followers": 0,
    "following": 0,
    "created_at": "2019-07-12T23:51:26Z",
    "updated_at": "2023-02-05T12:38:29Z"
}
In the next section, we will use the object above to create our home component.
Create Home Component
In this section, we will create the home component. The home component will display the following.
User's GitHub profile picture.
User's Github profile status.
User's Github profile link.
Follow the steps below to create the home component:
Navigate to the component folder.
Create a file. Name it Home**.jsx**.
Copy and paste the code below into Home.jsx.
import React from "react";
import "../assets/styles/home.css";

function Home({ user }) {
  return (
    <section className="home">
      <img src={user.avatar_url} alt="" />
      <p className="bio">{user.bio}</p>
      <a href={user.url} target="_blank" rel="noopener noreferrer">
        Github
      </a>
    </section>
  );
}

export default Home;
In the code above, we passed user as a prop to the home component from App.jsx. This gave us access to the properties in the user props. We then display the properties in the return statement of the home component. More on App.jsx in the next section.
Also, in the code above, we imported a CSS file named home.css. Home.css styles the home component. To create the home.css file, follow the steps below.
Navigate to the src folder.
Create a subfolder. Name the folder assets.
Create a new folder under the assets subfolder. Name the new folder styles.
Create a CSS file under the styles subfolder.
Name it home.css.
Copy the code below into home.css
* {
    box-sizing: border-box;
    margin: 0;
    padding: 0;
}

.home {
    margin-top: 10rem;
    display: flex;
    flex-direction: column;
    place-items: center;
    color: black;
}

.home img {
    border-radius: 50%;
    height: 15rem;
    width: 15rem;
}

.home p, .home a {
    margin-top: 1rem;
}

.home p {
    font-weight: bold;
}

.home a {
    border: 2px solid #8C96F8;
    padding: 1rem 2rem;
    border-radius: 10px;
    background-color: #FFF;
}
Update App.jsx
In this section, we will make some update to App.jsx. follow the steps below.
Open the App.jsx in the root directory.
Delete the code in the file.
Copy and paste the code below into App.jsx.
import { useEffect, useState } from "react";
import Home from "./components/Home";
import { fetchUserRepo } from "./components/ConsumeAPI";
import "./App.css";

function App() {
  const [data, setData] = useState(null);
  const [loading, setLoading] = useState(true);
  const [error, setError] = useState(null);


  // fetch my data from github api and store it in state
  useEffect(() => {

     fetchUserRepo()
    .then(data => {
      setData(data)
      setLoading(false)
      console.log(data)

    });
  }, []);


  return (
    <div className="App">
        <Home user={loading ? "loading" : data/>
    </div>
  );
}

export default App;
At the top of the code above, we imported the following dependencies.
useEffect and useState. These are react hooks.
Home component. We created this in the previous section.
fetchUserRepo. This is from consumeAPI.js.
App.css. A CSS file to style app component.
In the code above, the JSON returned from fetchUserRepo was stored in the data state. We then passed this as a prop named user to the home component. We then set user prop to 'loading' if loading is true, and to data if loading is false.
Update App.css
In this section, we will make an update to App.css. follow the steps below.
Open the App.css in the root directory.
Delete the code in the file.
Copy and paste the code below into App.css.
body {
    background-color: #FEF2F2;
}
Open your browser. Your app should look like the one below.

Display GitHub Repository
In this section, we will display a list of our GitHub repository using the GitHub API on our webpage.
Before going ahead to create the list of repositories, let's create a function in consumeAPI.js file. We will name this function fetchRepo.The fetchRepo function will fetch a list of our GitHub repository. follow the steps below to create fetchRepo function.
Navigate to consumeAPI.js.
Add the code below to the file.
export const fetchRepo = async () => {
    const response = await fetch(
      `https://api.github.com/users/codeinn001/repos`
    );
    const data = await response.json();
    return data;
};
The code above will return a JSON.
Import fetchRepo in App Component
In this section, we will import fetchRepo in App.js. fetchRepo returns a list of our GitHub repositories. We then store the returned list in the repo state.
update App.js component with the code below
import { fetchUserRepo, fetchRepo } from "./components/ConsumeAPI";


function App() {
  const [repos, setRepos] = useState(null);
  const [repoLoading, setRepoLoading] = useState(false);
  const [repoError, setRepoError] = useState(null);

// fetch github repos and store in repos state
  useEffect(() => {


    fetchRepo()
    .then(data => {
      setRepos(data)
      setRepoLoading(true)
      console.log(data)

    }).catch((err) => {
          setRepoError(err);
          setRepoLoading(false);
        });

  }, []);

 return(
    <div className="App">
        <Repositories repos={repoLoading ? repos : "loading"} />
    </div>
)
}
The code in App.js component should look like the one below
import { useEffect, useState } from "react";
import Home from "./components/Home";
import Repositories from "./components/Repositories";
import { fetchUserRepo, fetchRepo } from "./components/ConsumeAPI";
import "./App.css";

function App() {
  const [data, setData] = useState(null);
  const [loading, setLoading] = useState(true);
  const [error, setError] = useState(null);

  const [repos, setRepos] = useState(null);
  const [repoLoading, setRepoLoading] = useState(false);
  const [repoError, setRepoError] = useState(null);

  // fetch my data from github api and store it in state
  useEffect(() => {

     fetchUserRepo()
    .then(data => {
      setData(data)
      setLoading(false)
      console.log(data)

    });
  }, []);

useEffect(() => {


    fetchRepo()
    .then(data => {
      setRepos(data)
      setRepoLoading(true)
      console.log(data)

    }).catch((err) => {
          setRepoError(err);
          setRepoLoading(false);
        });

  }, []);


  return (
    <div className="App">
        <Home user={loading ? "loading" : data} />
        <Repositories repos={repoLoading ? repos : "loading"} />
    </div>
  );
}

export default App;
Create a Repositories.js Component
This component will display the repositories we fetched in App.js component. Follow the steps below to create the Repositories.js component.
Navigate to the components folder.
Create a file. name it Repositories.js.
Copy and paste the code below into the created file.
import React from "react";
import "../assets/styles/repositories.css";

function Repositories({ repos }) {
const showLess = (description) => {
    if (description.length > 100) {
      return description.slice(0, 100) + "...";
    }
    return description;
  };

  return (
    <div>
        <section className="repo-section">
          {repos === "loading" ? (
            <h1>Loading...</h1>
          ) : (
            repos.map((repo) => {
              return (
                <div className="repo" key={repo.id}>
                  <h2>{repo.name}</h2>
                  <p>{repo.description ? showLess(repo.description) : ""}</p>
                  <a href={repo.html_url} target="_blank" rel="noopener noreferrer">
                    View on Github
                  </a>
                </div>
              );
            })
          )}

        </section>
    </div>
  );
}

export default Repositories;
In the code above, we passed in repos as a prop. We map over it, then display the content of repos. Also, we created a showLess function. The showLess function truncate the description sentence if the length is greater than 100 characters.
Also, we imported repositories.css. Follow the steps below to create repositories.css.
Navigate to the styles subfolder.
Create a CSS file under the styles subfolder.
Name it repositories.css.
Copy the code below into repositories.css
* {
    box-sizing: border-box;
    color: black;
    margin: 0;
    padding: 0;
}

.back {
    justify-content: flex-start;
}

.repo-section {
    display: flex;
    align-items: center;
    justify-content: center;
    flex-wrap: wrap;
    margin: 0 auto;
    margin-top: 7rem;
    width: 100%;
    max-width: 1200px;
}

.repo {
    display: flex;
    flex-direction: column;
    align-items: center;
    justify-content: center;
    width: 350px;
    height: 200px;
    margin: 1rem;
    padding: 2rem;
    border-radius: 1rem;
    background-color: #fff;
    box-shadow: 0px 8px 23px rgba(218, 224, 249, 0.7);
    transition: all 0.3s ease-in-out;
}

.repo:hover {
    transform: translateY(-5px);
    box-shadow: 0px 8px 23px rgba(218, 224, 249, 0.9);
}

.repo h2, .repo p {
    margin-bottom: .5rem;
}


.repo p {
    text-align: center;
}

.details-link {
    border: 2px solid rgba(218, 224, 249, 0.7);
    padding: 5px 10px;
    border-radius: 5px;
    margin-top: 10px;
    font-weight: 400;
    color: black;
}
React Router
We can see that the contents of Home component and Repositories component appear on the same webpage. We can have Home component and Repositories component on different pages using react-router.
To install react-router run the command below in the root directory of your application.
npm install react-router-dom
Follow the steps below to configure your react-router application.
Navigate to index.js
Delete the code in the file.
Copy and paste the code below into the file.
import React from "react";
import ReactDOM from "react-dom/client";
import { BrowserRouter } from "react-router-dom";
import App from "./App";


ReactDOM.createRoot(document.getElementById("root")).render(
  <BrowserRouter>
    <React.StrictMode>
      <App />
    </React.StrictMode>
  </BrowserRouter>
);
In the code above, we imported BrowserRouter from react-router-dom. We wrapped the BrowserRouter around the App component. Wrapping it will enable react-router to have access to all our components.
Update App.jsx Component
We need to update App. jsx with the code below.
import { useEffect, useState } from "react";
import Navbar from "./components/Navbar";
import Home from "./components/Home";
import Repositories from "./components/Repositories";
import { fetchUserRepo, fetchRepo } from "./components/ConsumeAPI";
import { Route, Routes } from "react-router-dom";
import "./App.css";

function App() {
  const [data, setData] = useState(null);
  const [loading, setLoading] = useState(true);
  const [error, setError] = useState(null);

  const [repos, setRepos] = useState(null);
  const [repoLoading, setRepoLoading] = useState(false);
  const [repoError, setRepoError] = useState(null);

  // fetch my data from github api and store it in state
  useEffect(() => {

     fetchUserRepo()
    .then(data => {
      setData(data)
      setLoading(false)
      console.log(data)

    });
  }, []);

useEffect(() => {


    fetchRepo()
    .then(data => {
      setRepos(data)
      setRepoLoading(true)
      console.log(data)

    }).catch((err) => {
          setRepoError(err);
          setRepoLoading(false);
        });

  }, []);


  return (
    <div className="App">
        <Navbar />
        <Routes>
          <Route
            path="/"
            element={<Home user={loading ? "loading" : data} />}
          />
          <Route
            path="/repos"
            element={<Repositories repos={repoLoading ? repos : "loading"} />}
          />
        </Routes>
    </div>
  );
}

export default App;
In the code above, we specified a path for each component by wrapping them in a Route component imported from react-router-dom.
We also imported Navbar component. We will create this in the next section.
Create Navbar Component
Haven created home and repositories components, we need to create a navbar component. The navbar component will contain links that will navigate users to either the home or repositories component. Follow the steps below to create the Navbar component.
Navigate to the components folder.
Create a file. name it Navbar.js.
Copy and paste the code below into the created file.
import React from "react";
import { Link } from "react-router-dom";
import "../assets/styles/nav.css";


function Navbar() {
  return (
    <nav className="nav">
      <h1 className="heading">Codeinn's GitHub Repo</h1>
      <div className="nav-links">
        <Link className="nav-link" to="/">
          Home
        </Link>
        <Link className="nav-link" to="/repos">
          Repositories
        </Link>
      </div>
    </nav>
  );
}

export default Navbar;
In the above code, we imported Link from react-router-dom. Link as a to attribute that accept the path to a component.
Also, we imported a nav.css file. follow the steps below to create a nav.css file.
Navigate to the styles folder.
Create a file under the styles folder.
Name it nav .css.
Copy the code below into nav.css
* {
    box-sizing: border-box;
    margin: 0;
    font-size: 0.85rem;
}


.nav {
    display: flex;
    justify-content: space-between;
    align-items: center;
    padding: 2rem 3rem;
    background-color: #fff;
    border-bottom: 1px solid #e7e7e7;
    box-shadow: 0 1px 3px rgba(0, 0, 0, 0.12);
    position: fixed;
    top: 0;
    width: 100%;
    z-index: 100;
    color: black;
}

.heading {
    width: 40%;
}

.nav-links {
    display: flex;
    gap: 2rem;
    justify-content: right;
    width: 60%;
    padding-left: 5rem;
}

.nav-link {
    text-decoration: none;
    color:rgba(0, 0, 0);
    font-weight: bold;
}
The final application should look like the one below
Conclusion
We learned how to consume GitHub API using react, and how to use react-router.
You can challenge yourself by adding the following functionalities.
Pagination to repositories component.
Improve the user interface.
Error boundary.
Use axios to consume API.